How to Fill Cracks in Wooden Mantel (Step-by-Step DIY Guide)
If you’re tackling filling cracks in wooden mantel, this step-by-step guide will show you exactly how to repair cracks and knots for a smooth, professional finish. Whether it was the original wood you used or over time, solid wood mantels naturally develop cracks, checks, and knot voids due to seasonal expansion and contraction. While these imperfections can add rustic character, they can also collect dust, weaken the surface, or interfere with staining and finishing.
In this tutorial, I’ll walk you through the exact process used in this project, including the materials, preparation steps, filling process, and finishing tips to ensure long-lasting results.
Why Cracks Form in a Wooden Mantel
Before filling cracks in a wooden mantel, it helps to understand why they appear:
- Moisture changes cause wood to expand and contract
- Natural checking occurs as thick wood dries
- Knots loosen over time, creating gaps or voids
- Structural stress can widen small splits
Most cracks are cosmetic, but properly filling them prevents further spreading and creates a cleaner, more finished look.
Materials & Tools Needed
To properly repair your mantel, gather the following:
- Two-part epoxy resin (clear or tintable) – JB Weld 5 Minute Epoxy
- Wood dye, pigment, or epoxy colorant
- Mixing cups and stir sticks – 3oz Dixie Cups
- Heat gun or small torch (for removing bubbles) – Bernzomatic Torch
- Painter’s tape
- Sandpaper (80–220 grit)
- Safety gloves and eye protection
Using epoxy instead of basic wood filler is recommended for deeper cracks and knot holes because it bonds more strongly and resists shrinkage.
Step 1: Prepare the Mantel Surface
Proper preparation is critical when filling cracks in a wooden mantel.
- Lightly sand around the damaged area.
- Clean the crack thoroughly using compressed air or a vacuum.
- Remove loose debris or splinters.
- Wipe clean to remove dust.
- Use painter’s tape around the crack to prevent epoxy from spreading.
If the crack runs deep, ensure it’s completely dry before proceeding.
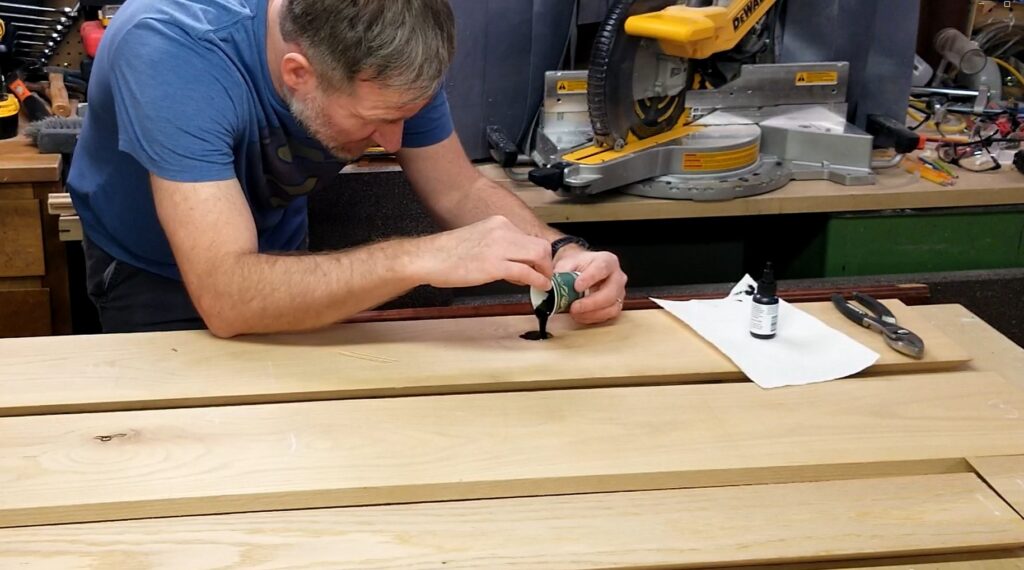
Step 2: Mix and Tint the Epoxy
Most mantels look best when repairs blend naturally with the wood grain.
- Mix the two-part epoxy according to the manufacturer’s instructions.
- Add dye or pigment to match your mantel’s tone.
- Stir thoroughly to avoid soft spots.
Tinting the epoxy darker often helps mimic natural wood knots.
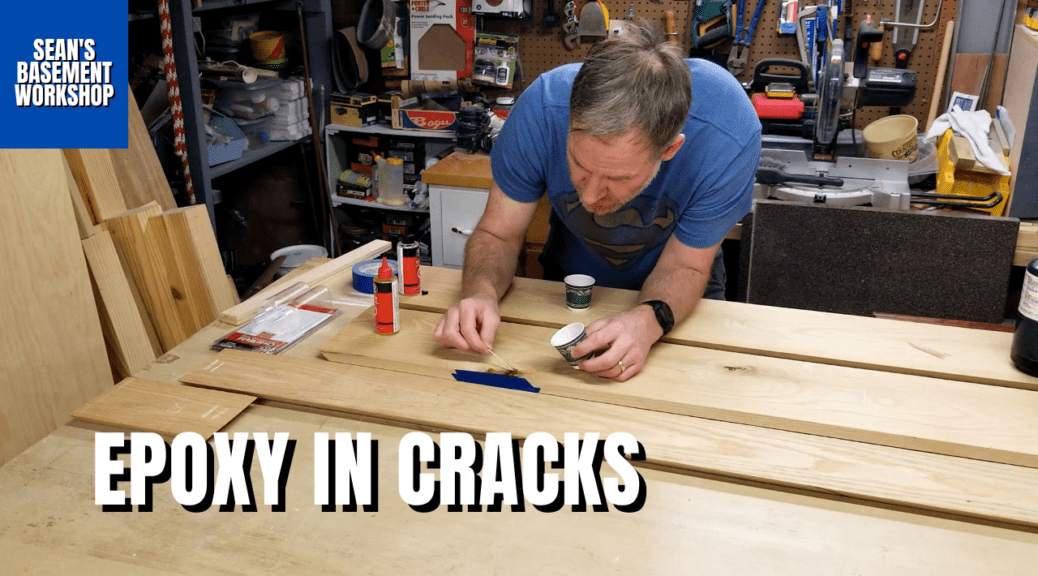
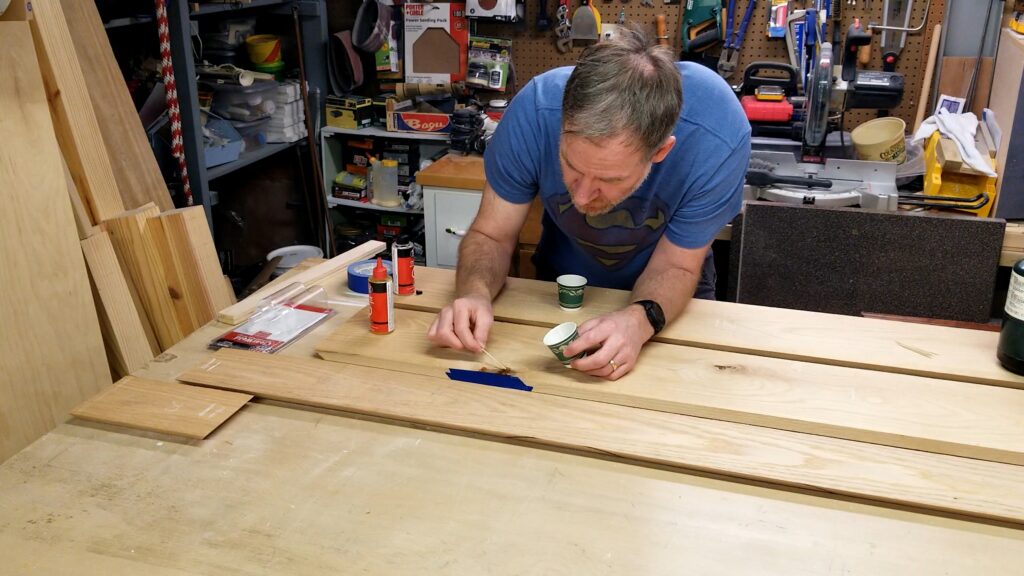
Step 3: Fill the Cracks and Knots
Now it’s time for the main repair.
- Slowly pour or press epoxy into the crack.
- Overfill slightly to allow for sanding.
- Use a heat gun or torch briefly to remove air bubbles.
- Allow the epoxy to self-level.
For deeper cracks, you may need multiple pours. Let each layer cure fully before adding more.
Step 4: Let It Cure Completely
Cure times vary depending on temperature and epoxy type. Typically:
- Light set: 4–6 hours
- Full cure: 24 hours
Avoid sanding too early, as this can pull epoxy from the crack.
Step 5: Sand and Finish
Once fully cured:
- Sand flush with 80–120 grit sandpaper.
- Progress to finer grits (180–220) for a smooth surface.
- Wipe clean.
- Apply stain or finish as desired.
When done properly, the filled area should blend seamlessly with the rest of the mantel.
Pro Tips for Better Results
- Work in a dust-free environment.
- Slightly warm epoxy flows better into narrow cracks.
- Use a darker pigment for knot holes to create a natural effect.
- Always overfill slightly — epoxy shrinks minimally, but sanding removes material.
- Test color on scrap wood before applying to your mantel.
Common Mistakes to Avoid
- ❌ Using lightweight wood filler on deep cracks
- ❌ Skipping surface cleaning
- ❌ Not sealing the underside of through-cracks
- ❌ Sanding before full cure
- ❌ Forgetting to tint the epoxy
Avoiding these mistakes ensures a long-lasting repair.
You can see how I built the entire Faux Mantel Build in that article if you want.
I hope you find this helpful video useful and can use some of the tips presented. Feel free to leave any comments, suggestions, or experiences you have had below.
Some of the links in my video description and article above are Amazon Affiliate links. As an Amazon Associate, I earn from qualifying purchases. If you would like to make a purchase from Amazon, you can also use the storewide link.
Frequently Asked Questions
What is the best product for filling cracks in wooden mantel?
Two-part epoxy resin is the most durable and professional option, especially for deep cracks and knot holes.
Can I use wood filler instead of epoxy?
You can use it for small surface cracks, but epoxy performs better for structural voids and larger gaps.
Will cracks come back after filling?
If the wood continues to move significantly due to moisture changes, minor hairline cracks can reappear. Keeping indoor humidity stable helps prevent this.
Should I stain before or after filling?
Always fill cracks before staining so the repair blends with the finished surface.
Final Thoughts
Filling cracks in a wooden mantel is a straightforward DIY project that dramatically improves appearance and durability. With proper preparation, tinted epoxy, and careful sanding, you can achieve professional-quality results that last for years.
If you found this guide helpful, be sure to check out more woodworking and mantel build tutorials here on SNAServices.com.