
Winter weather is tough on your tools. If your shovel is scraping poorly, leaving snow behind, or showing visible wear, it may be time for a snow shovel blade replacement.
The good news? Replacing a worn shovel blade is simple, affordable, and can extend the life of your tool for years. In this guide, I’ll walk you through the exact steps to replace your snow shovel blade quickly and correctly.

Why Snow Shovel Blade Replacement Matters
A worn blade can:
- Leave a thin layer of snow or ice behind
- Damage driveways or decking
- Make shoveling harder than it needs to be
- Increase strain on your back and shoulders
Performing a snow shovel blade replacement restores scraping performance and improves efficiency during heavy winter storms.
Tools Needed for Snow Shovel Blade Replacement
Before starting, gather these tools:
- Corded or cordless drill
- Drill bit about the same size as the rivets holding on the old steal blade
- Marking tool – marker or pencil
- Some sort of lubricant
- Tape Measure
- Hacksaw or another tool to cut off some new steel
- Rivet Gun and appropriately sized rivets
- Hammer
- Flat Screwdriver
- Flat Steel bar (approximately the size width of where the old blade was)
- Metal File (optional)
Okay I know that sounds daunting but it’s really not. The rivet gun is the only specialty tool you’ll need. The rest you may already have except the steel bar and the rivets. Having everything ready makes the job fast and frustration-free.
Step-by-Step Snow Shovel Blade Replacement
Step 1: Inspect the Existing Blade
Lay your shovel flat on a stable surface. Examine the blade edge for:
- Cracks
- Severe wear
- Bent metal
- Missing fasteners
Confirm that your blade is removable. Some lower-cost shovels do not have replaceable edges.
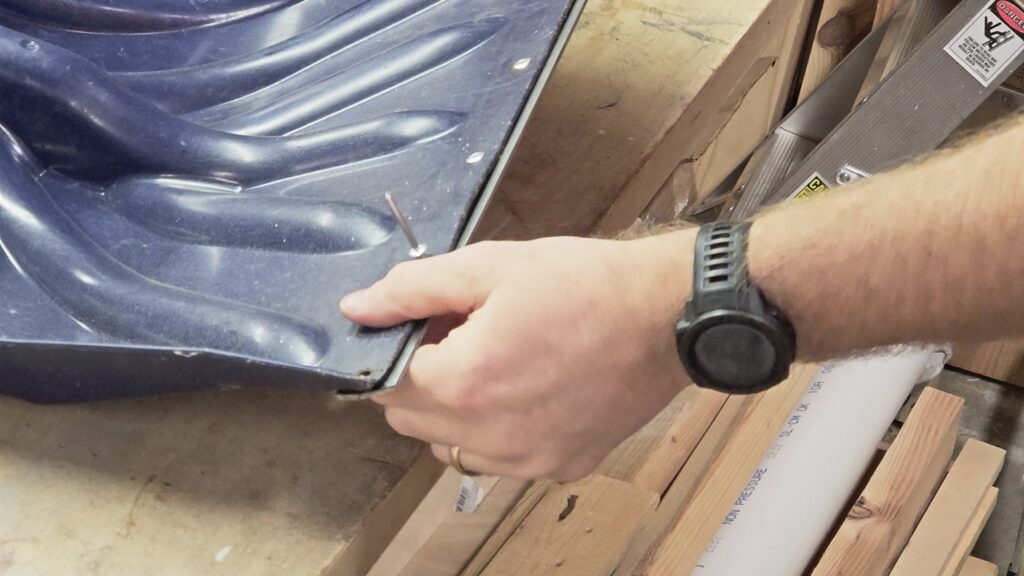
Step 2: Remove the Worn Blade
Using your wrench or socket:
- Loosen and remove the bolts holding the blade in place. If your blade does not have bolts holding it in you’ll need to use a drill and drillbit to drill out the rivets – skip #2 if you have rivets.
- If bolts are rusted, apply penetrating oil and allow it to sit for several minutes.
- Carefully remove the old blade and set it aside.
Take note of how the blade is positioned — this will help during installation.
Okay I know that sounds daunting but it’s really not. The rivet gun is the only specialty tool you’ll need. The rest you may already have except the steel bar and the rivets.
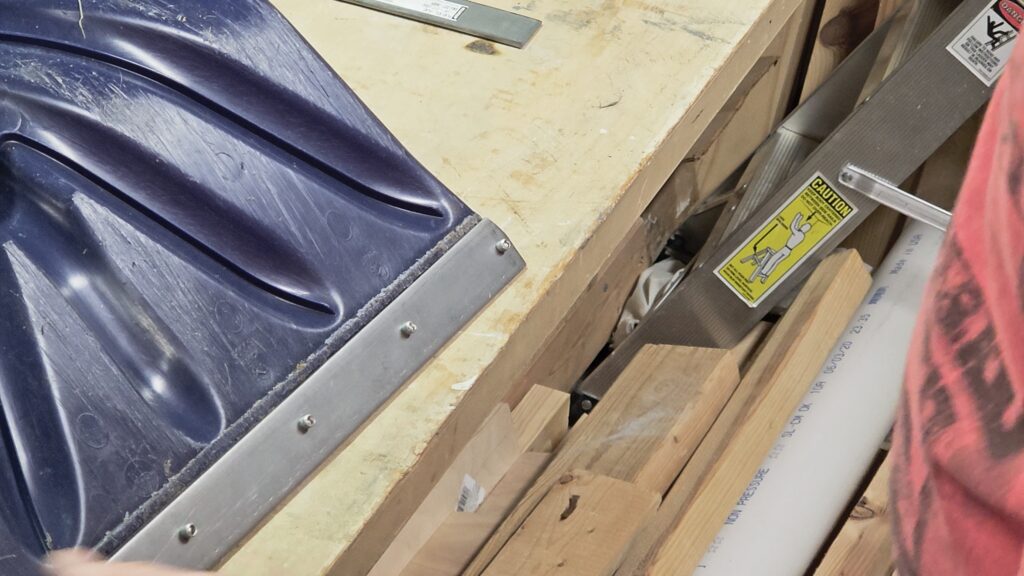
Step 3: Prepare the New Blade

My first step was to remove the old worn out blade by drilling the old rivets out. I did this with my Kobalt cordless drill using 3/16″ drill bit. This allowed me to remove part of the rivet which then allowed me to use a screwdriver to pop the old rivet stud though the shovel.
The next step in this process was to measure the width and the length of where the old blade was. I determined for my shovel a 1 1/4″ flat steel bar would work as long as it was at least 18 inches long. I headed down to my local home center and picked up some 1/8″ x 1 1/4″ x 36″ flat steel bar and some 3/16″ rivets. These were the same size as what was in there.
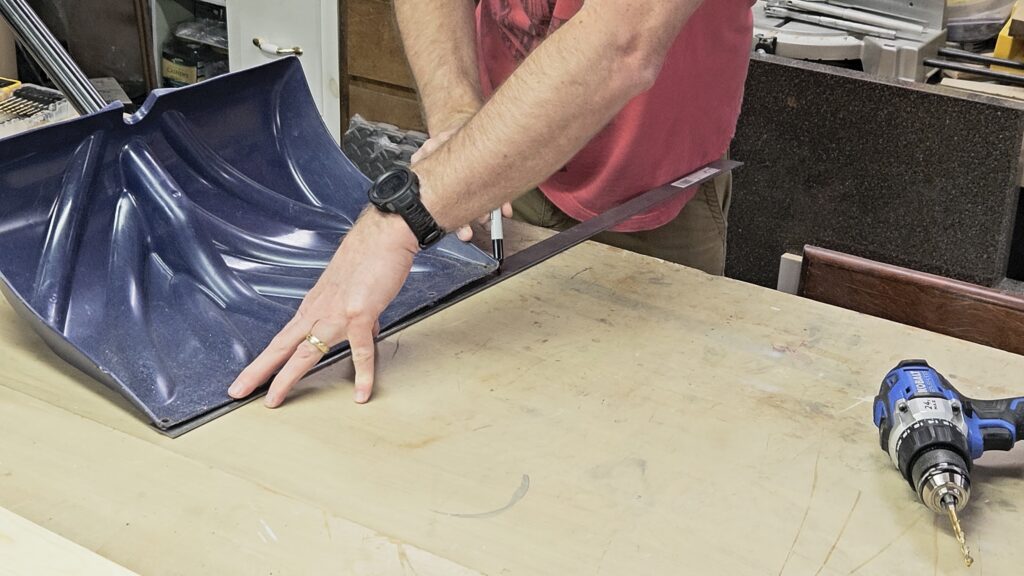
Once all the old blade was removed I placed the new flat steel bar on the shovel and used a sharpie to mark the correct length and the angle the ends would need to be cut at.
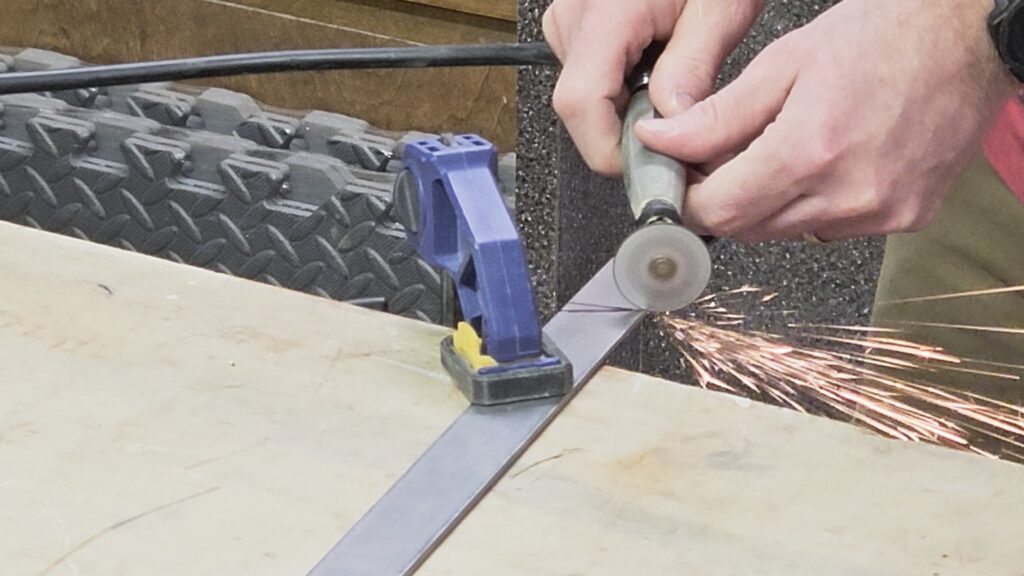
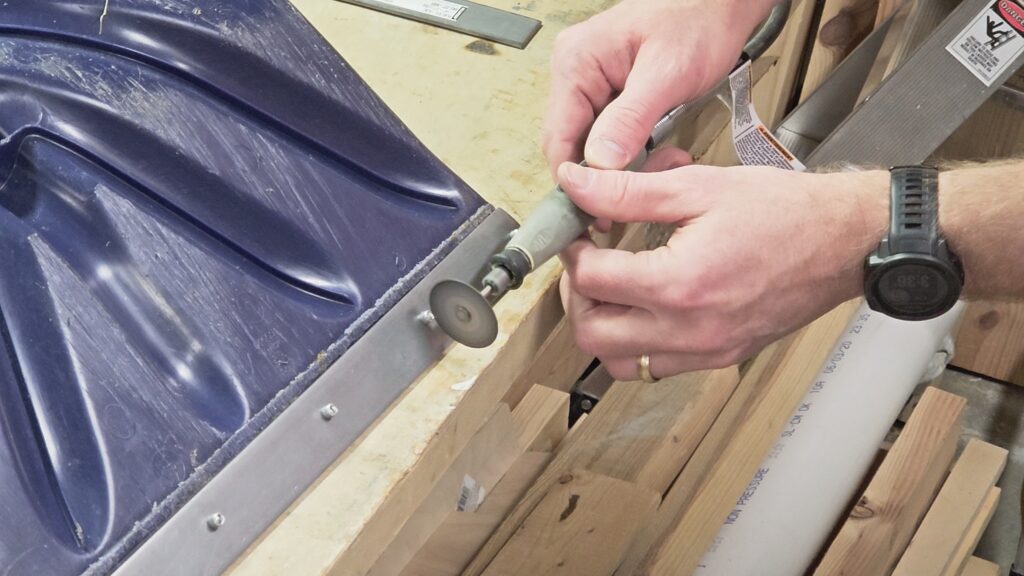
Now, depending on what you have to cut steel with (hacksaw, angle grinder or Dremel), you’ll need to cut the steel bar to match the lines you drew in the previous step. I am fortunately to have a Dremel so I used it with a cutoff wheel to cut through it.
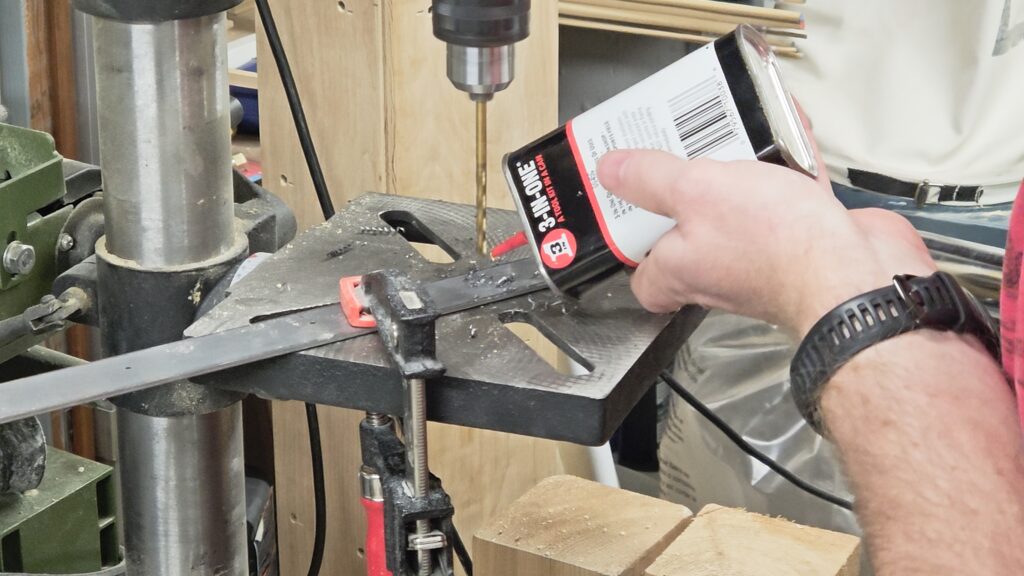
Once I had the metal cut to length I put it back on the shovel and marked where the previous rivet holes were in the shovel. Now, off to my drill press to drill the holes using the same 3/16″ bit because that is the size of the rivets. Now, you can drill these by hand using your drill but you should clamp down this metal. Even on a drill press you should clamp down this metal to prevent the bit from catching it and spinning it around like a lawn mower blade.
Before and during the drill process of each hole you’ll want to put a drop or so of lubricant down. I used 3-in-ONE Oil but you can use any oil. The purpose is to keep the bit from over heating which will greatly dull and wear out your bit.
Once all the holes are drill, clean off the metal shavings and oil. I used a paper towel and just wiped it off into the trash.
Step 4: Align the New Blade
Position the new blade along the bottom edge of the shovel.
Make sure:
- Holes line up perfectly
- The blade sits flush against the shovel
- The scraping edge faces the correct direction
Proper alignment ensures your snow shovel blade replacement performs correctly
Step 5a: Secure the Blade with Bolts
Insert the bolts through the aligned holes if you have one that uses bolts.
- Tighten evenly from side to side.
- Avoid overtightening, which can warp the blade.
- Ensure the blade is secure and does not move.
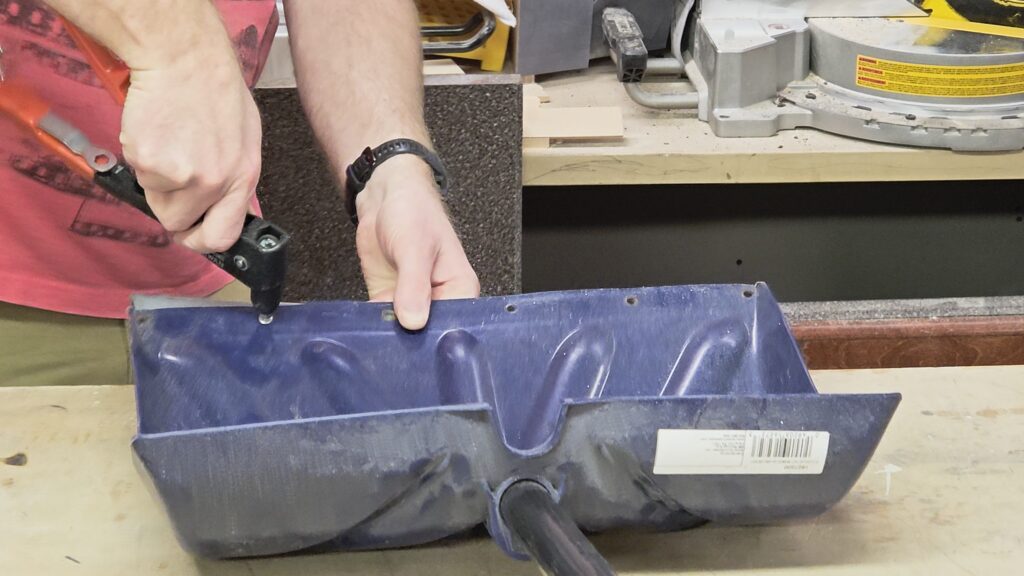
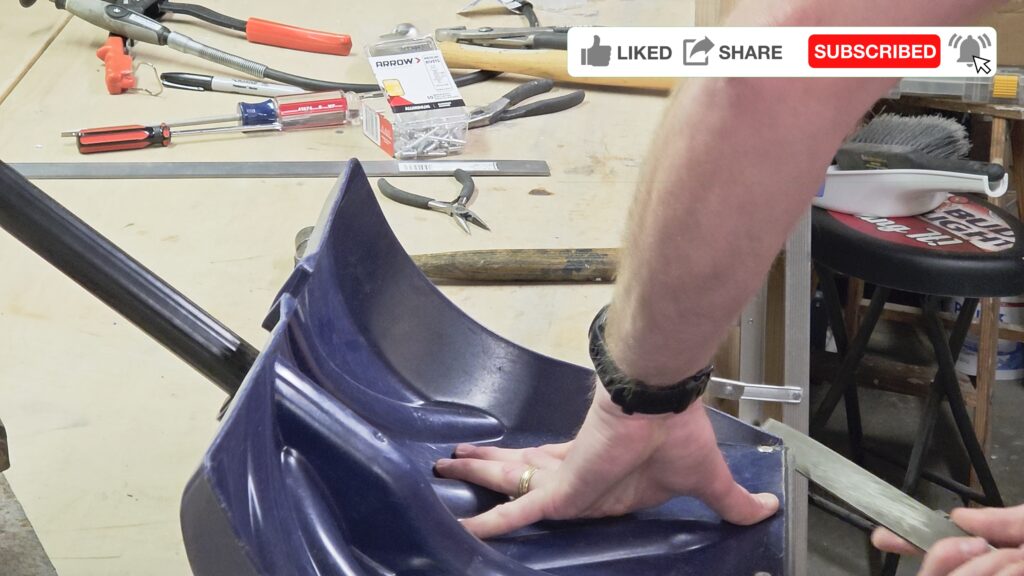
Step 5b: Secure the Blade with Rivets
If yours had rivets and you need to replace with rivets:
Now you’ll want to line up one of the holes in the shovel and steel bar. Load the rivet gun by sticking the small nail like piece of the rivet into the gun. Then shove that fat end of the rivet through the hole making sure it goes all the way through the steel bar and the shove hole. Then just start squeezing the rivet gun handle until you hear a loud pop. The nail like end will break off and you’ll have set your first rivet. Do this same thing to the rest of the holes.
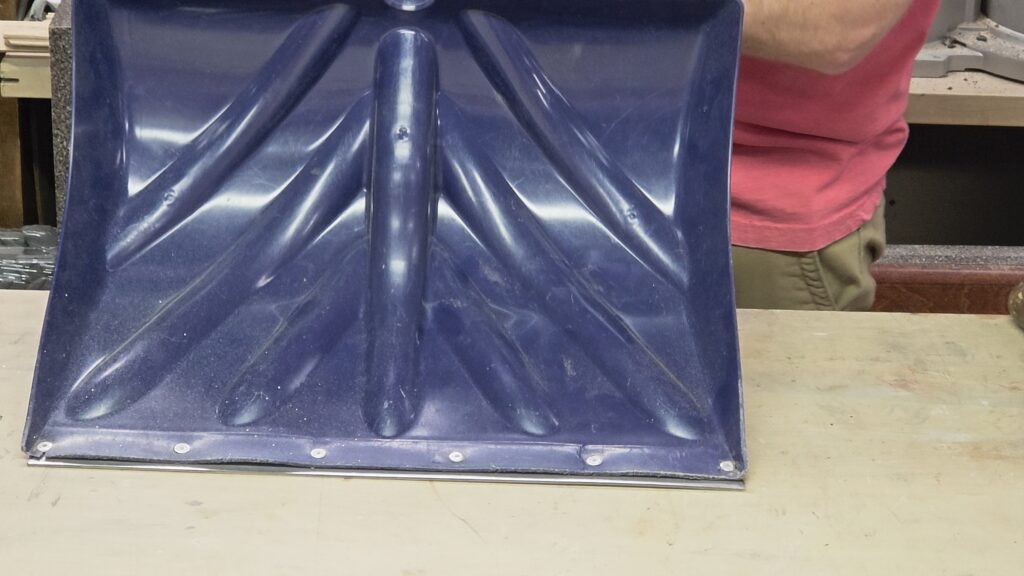
When done you’ll probably notice a flat button like piece of metal on one side of the shovel and a little knob on the other side. Now, these little knobs will have to be dealt with as they will not allow the shovel to slide smoothly on the surface.
To do this, I ended up slicing these in half and then flatting them out with a ball peen hammer but any hammer will do. You’ll need a hard surface to be on the other side of where you are hitting otherwise you can damage the surface you’re hitting on. For me, my “anvil” is just small section of railroad track that I just happen to have laying around. However, you can use an anvil, a vice or anything else that is strong enough to allow the hammer to smash the metal rivet flat.
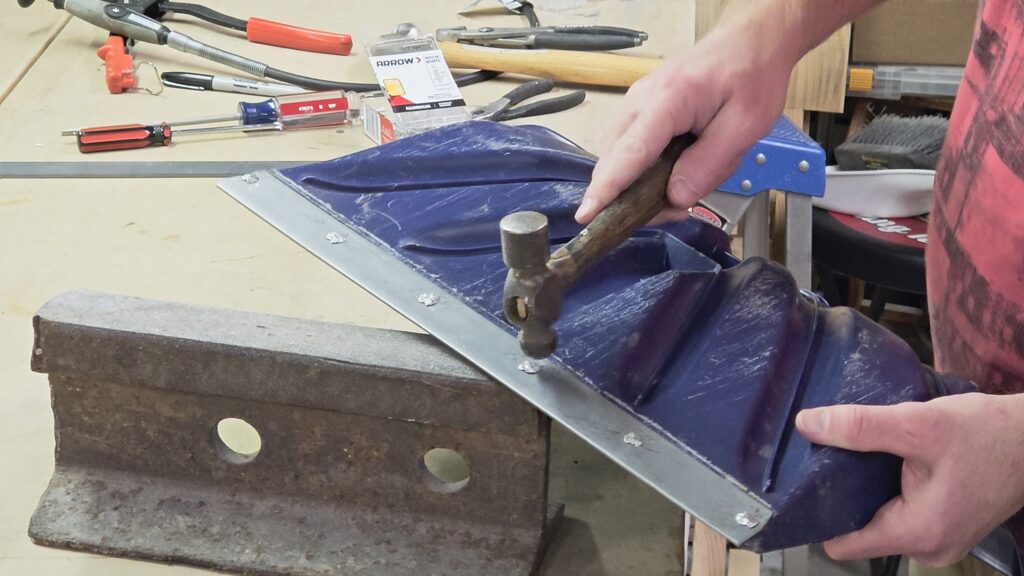
Once I flattened all the rivets flat I decided to take a file and file down the corners. These corners were quite sharp for me and I didn’t want them to snag on anything. Rounding over these corners was the last step for me.
Once secured, your snow shovel blade replacement is complete.
Now my new flat steel blade sticks out from the shovel end about 1/8″ but this will keep the plastic from wearing away on the concrete I need to shovel. In addition, this extra part of the steel makes a great hard edge to vertically hit into any ice or packed snow breaking it up quickly.
Pro Tips for Longer Blade Life
To maximize the lifespan of your new blade:
- Store your shovel indoors when possible
- Rinse off salt after use
- Avoid scraping over rough gravel
- Inspect bolts or rivets mid-season
Regular maintenance reduces the need for frequent snow shovel blade replacement.
How Often Should You Replace a Snow Shovel Blade?
Replacement frequency depends on:
- Usage intensity
- Surface type (concrete vs. gravel)
- Blade material (steel vs. plastic)
Heavy winter use may require a new blade every 1–2 seasons, while light residential use may last several years.
Choosing the Right Replacement Blade
When buying a replacement blade:
- Match the width exactly
- Choose durable steel for longevity
- Confirm compatibility with bolt spacing
Using the correct blade ensures your snow shovel blade replacement delivers professional results.
Final Thoughts on Snow Shovel Blade Replacement
Replacing a worn blade is one of the easiest ways to improve your winter efficiency. Instead of buying a brand-new shovel, a simple snow shovel blade replacement saves money and restores performance.
With just a few tools and a short amount of time, you can get back to clearing snow like a pro.
Frequently Asked Questions About Snow Shovel Blade Replacement
How do I perform a snow shovel blade replacement?
To perform a snow shovel blade replacement, remove the bolts securing the worn blade using a wrench or socket set. Align the new blade with the existing mounting holes and insert the bolts. Tighten them evenly to ensure the blade sits flush and secure before use.
How often should I replace a snow shovel blade?
Snow shovel blade replacement frequency depends on usage and surface type. Heavy use on rough concrete may require replacement every one to two seasons, while light residential use on smooth surfaces can last several years.
Can all snow shovels have the blade replaced?
Not all snow shovels are designed for blade replacement. Many higher-quality models feature removable steel or plastic edges secured with bolts. Some lower-cost models are molded as a single piece and cannot be repaired.
What tools are needed for snow shovel blade replacement?
Most snow shovel blade replacement jobs require, depending on bolt or riveted blades
- Adjustable wrench or socket set
- Screwdriver (if applicable)
- Work gloves
- Penetrating oil for rusted bolts
- Corded or cordless drill
- Drill bit about the same size as the rivets holding on the old steal blade
- Marking tool – marker or pencil
- Some sort of lubricant
- Tape Measure
- Hacksaw or another tool to cut off some new steel
- Rivet Gun and appropriately sized rivets
- Hammer
- Flat Screwdriver
- Flat Steel bar (approximately the size width of where the old blade was)
- Metal File (optional)
Is it cheaper to replace the blade or buy a new shovel?
In most cases, snow shovel blade replacement is much cheaper than buying a new shovel. Replacing only the blade restores scraping performance and extends the life of your existing tool.
Equipment and Materials
I hope you find this helpful video useful and can use some of the tips presented. Feel free to leave any comments, suggestions, or experiences you have had below.
Some of the links in my video description and article above are Amazon Affiliate links. As an Amazon Associate, I earn from qualifying purchases. If you would like to make a different purchase from Amazon, you can also use the storewide link.