Do you want to separate your upper and base cabinets from your refrigerator? If so you might be interested in adding a cabinet partition wall between them. Some people like being able to see their refrigerator from the countertop between the cabinets – maybe to magnetically stick stuff on the side, etc. This was the way our kitchen was set up before our remodel. However, with the remodel we no longer wanted that approach and the need to fish stuff out that fell between the base cabinet and the refrigerator.
In comes a cabinet partition. The approach we took was a simple vertical piece of material that matched our cabinets that connected the sides of the upper and base cabinets from the ceiling to floor. This would allow for an enclosed look for our refrigerator and keep stuff from falling off the counter in the crack between the base cabinet and refrigerator. You wouldn’t believe how many times I had to fish stuff out of there!
That said my approach was simple. Rip a sheet of plywood lengthwise at 23 1/2 inches wide. This would provide 1/2 inch for a front edge for a total of 24 inches which is the standard depth of base cabinets. Besides, this vertical piece now would also add support to the cabinet that will reside above our refrigerator.
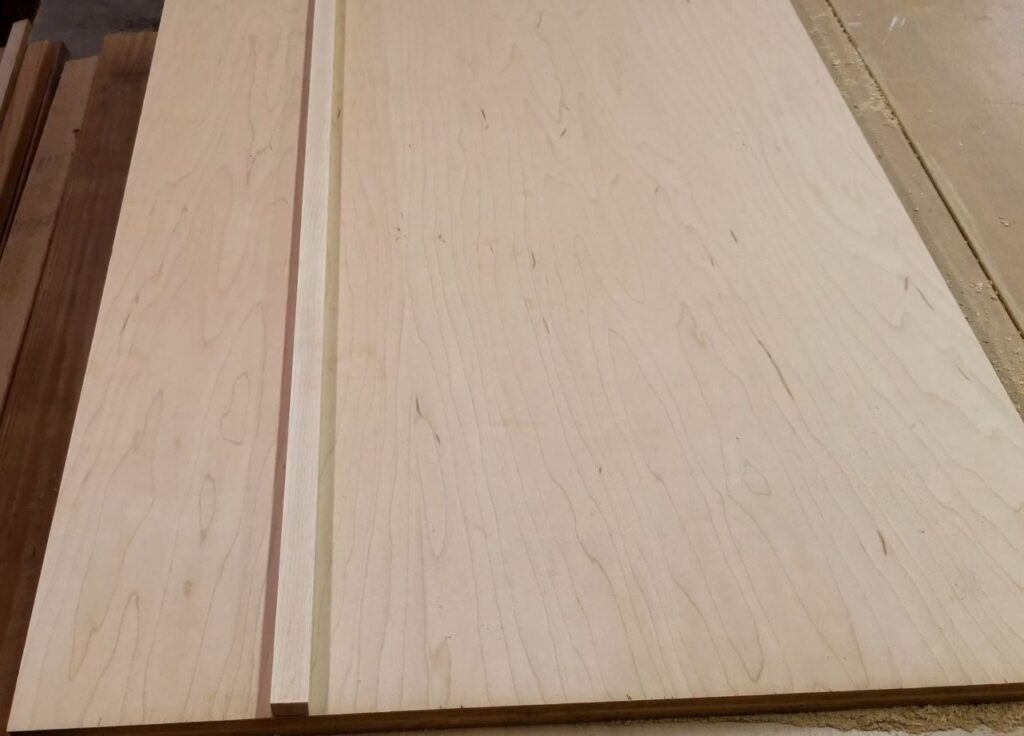
After ripping the sheet of plywood in the desired width my next step is to put some sort of edge band on. You could simply use laminate edge banding however in my household like many others this edge can easily get knocked, scraped, bumped, or just about anything that would tear laminate to shreds. So rather than use laminate, I used a 1/2 x 3/4 inch piece of maple that was also 96 inches tall.
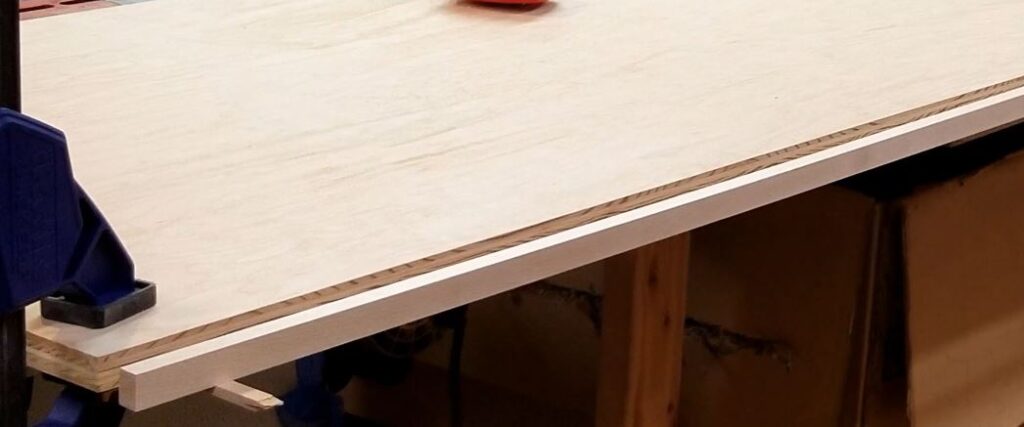
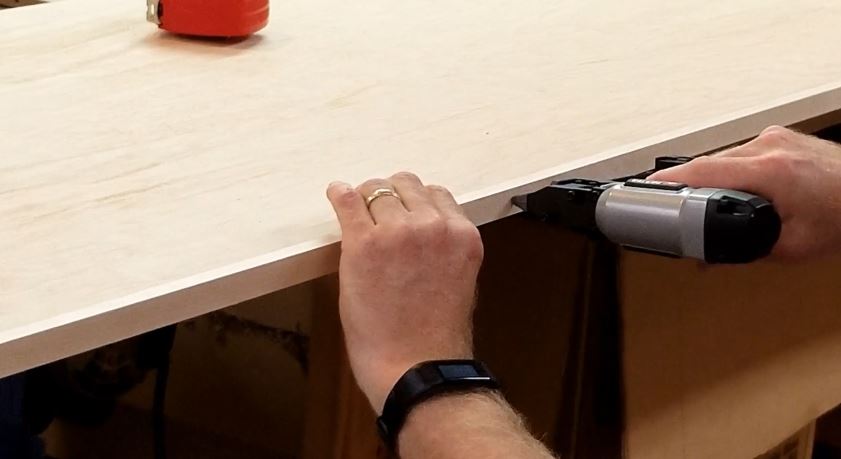
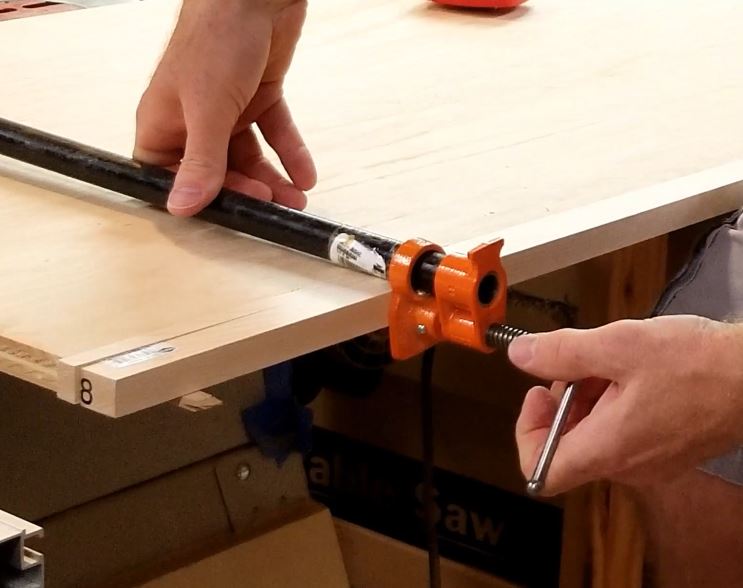
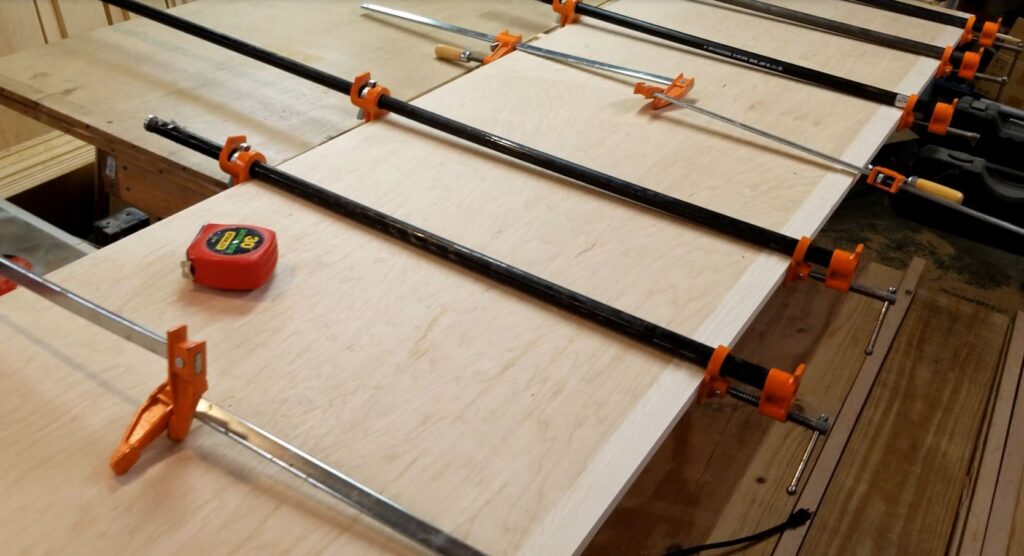
I cut this just a little oversized so I could trim it off after I had attached it to the plywood. To attach it to the plywood I spread some Titebond II wood glue on one side of the edge band making sure the entire side was covered. I affixed it to the side with my Porter Cabinet 23G Gauge Pin Nailer followed by some PONY 52 pipe clamps. Of course, at the time like many woodworkers, I never had enough clamps so I had to interlock some Jorgensen 3724 24-Inch Steel Bar Clamps to finish it up. Be sure to use a clamping caul to avoid marring your edge band and to evenly distribute the clamping force. I wanted both the chemical bond of the wood glue and the pins to hold it in place for maximum strength.

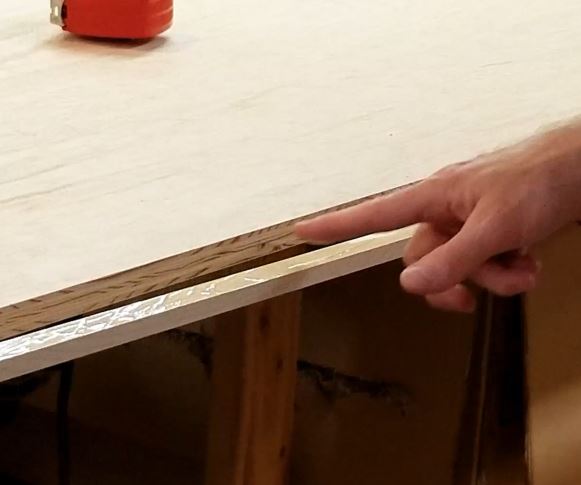
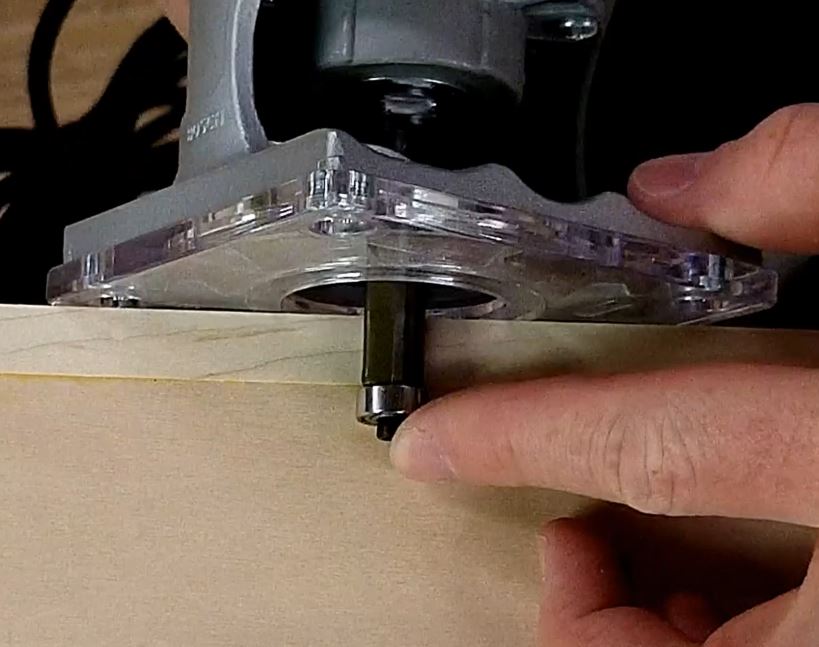
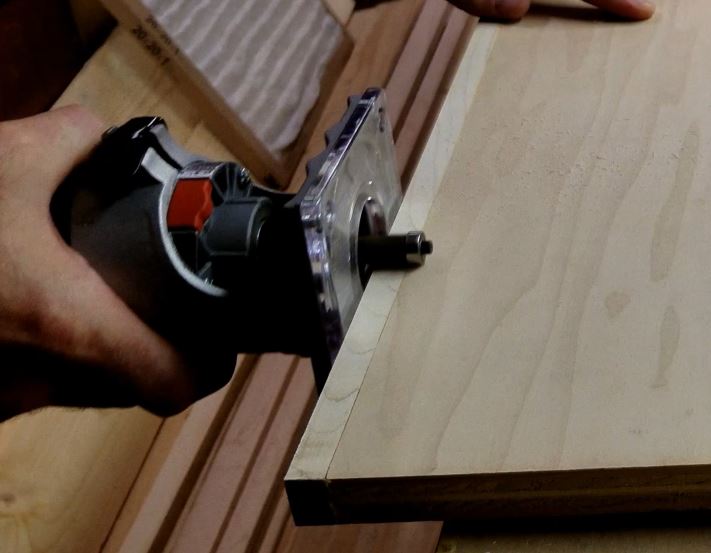
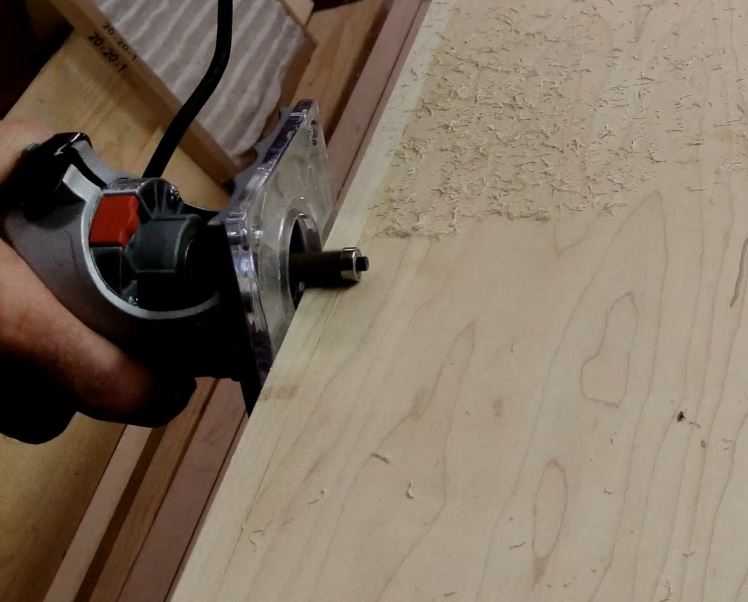
Once the glue had dried I scraped the dried glue bead down with my Hyde 10530 Paint Scraper to remove the bulk of the glue. Once this was done I carefully set my Bosch PR20EVS Palm Router up with a flush-trim bit so the edge of the cutter was just shy of the plywood, after all, I didn’t want to take any of the plywood’s veneer off. I ran the router down all for edges of the plywood to flush up the Maple edge band to the face of the veneer and fished up any leftover again with the scraper.
Finish up with a quick sanding and this piece for my kitchen remodel was ready for the finishing process.
As always if you have any questions or comments post them below or on my YouTube video comments section and I’ll do my best to respond.
I’ve included a few Amazon Links below for the equipment and materials I used.
Equipment and Materials
- PONY 52 Pipe Clamp
- Bessey GSCC2.506 6″, Clutch StyleMedium Duty Clamp
- IRWIN QUICK-GRIP Bar Clamp, One-Handed, Medium-Duty, 12-Inch
- Jorgensen 3724 24-Inch Steel Bar Clamp
- Titebond II Glue
- Hyde 10530 Paint Scraper
- Porter Cable 23 Gauge Pin Nailer
- Bosch Palm Router
- Walker’s Razor Slim Passive Earmuffs
- Freud 1/2″ (Dia.) Bearing Flush Trim Bit with 1/4″ Shank
I hope you find this video useful and can use some of the tips presented. Feel free to leave any comments, suggestions, or experiences you have had below.
Some of the links in my video description and article above are Amazon Affiliate links. As an Amazon Associate, I earn from qualifying purchases. If you would like to make a different purchase from Amazon, you can also use the storewide link.