About a year ago I started the process rebuilding out kitchen cabinets. While that project has been done nearly 8 months now organizing and editing the videos has been an ongoing nightmare to say the least. There are nearly 1TB worth of videos and photos that had to be organized and edited to create this mini-series and unfortunately with today’s ever changing events – its taken me a while. However, I’ve finally been able to produce a few episodes and will begin releasing them with this one below.
After some back and forth with our contractor and their designer we finally had our kitchen plan laid out. I chose to build the cabinets while they did all the rest of the work.
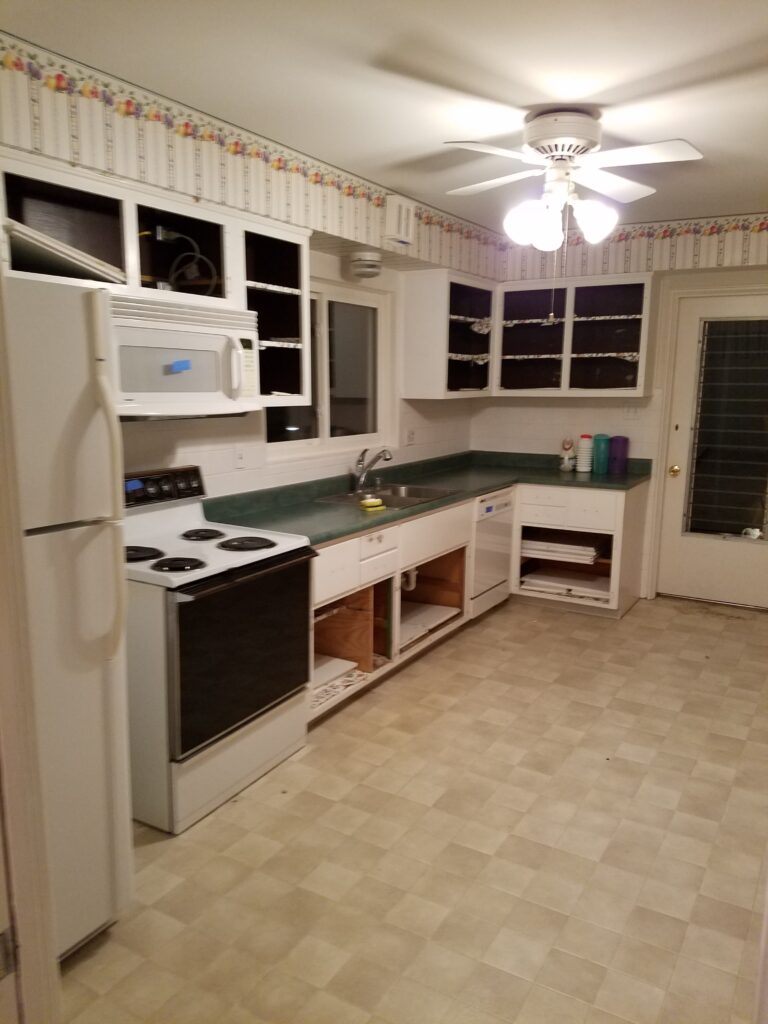
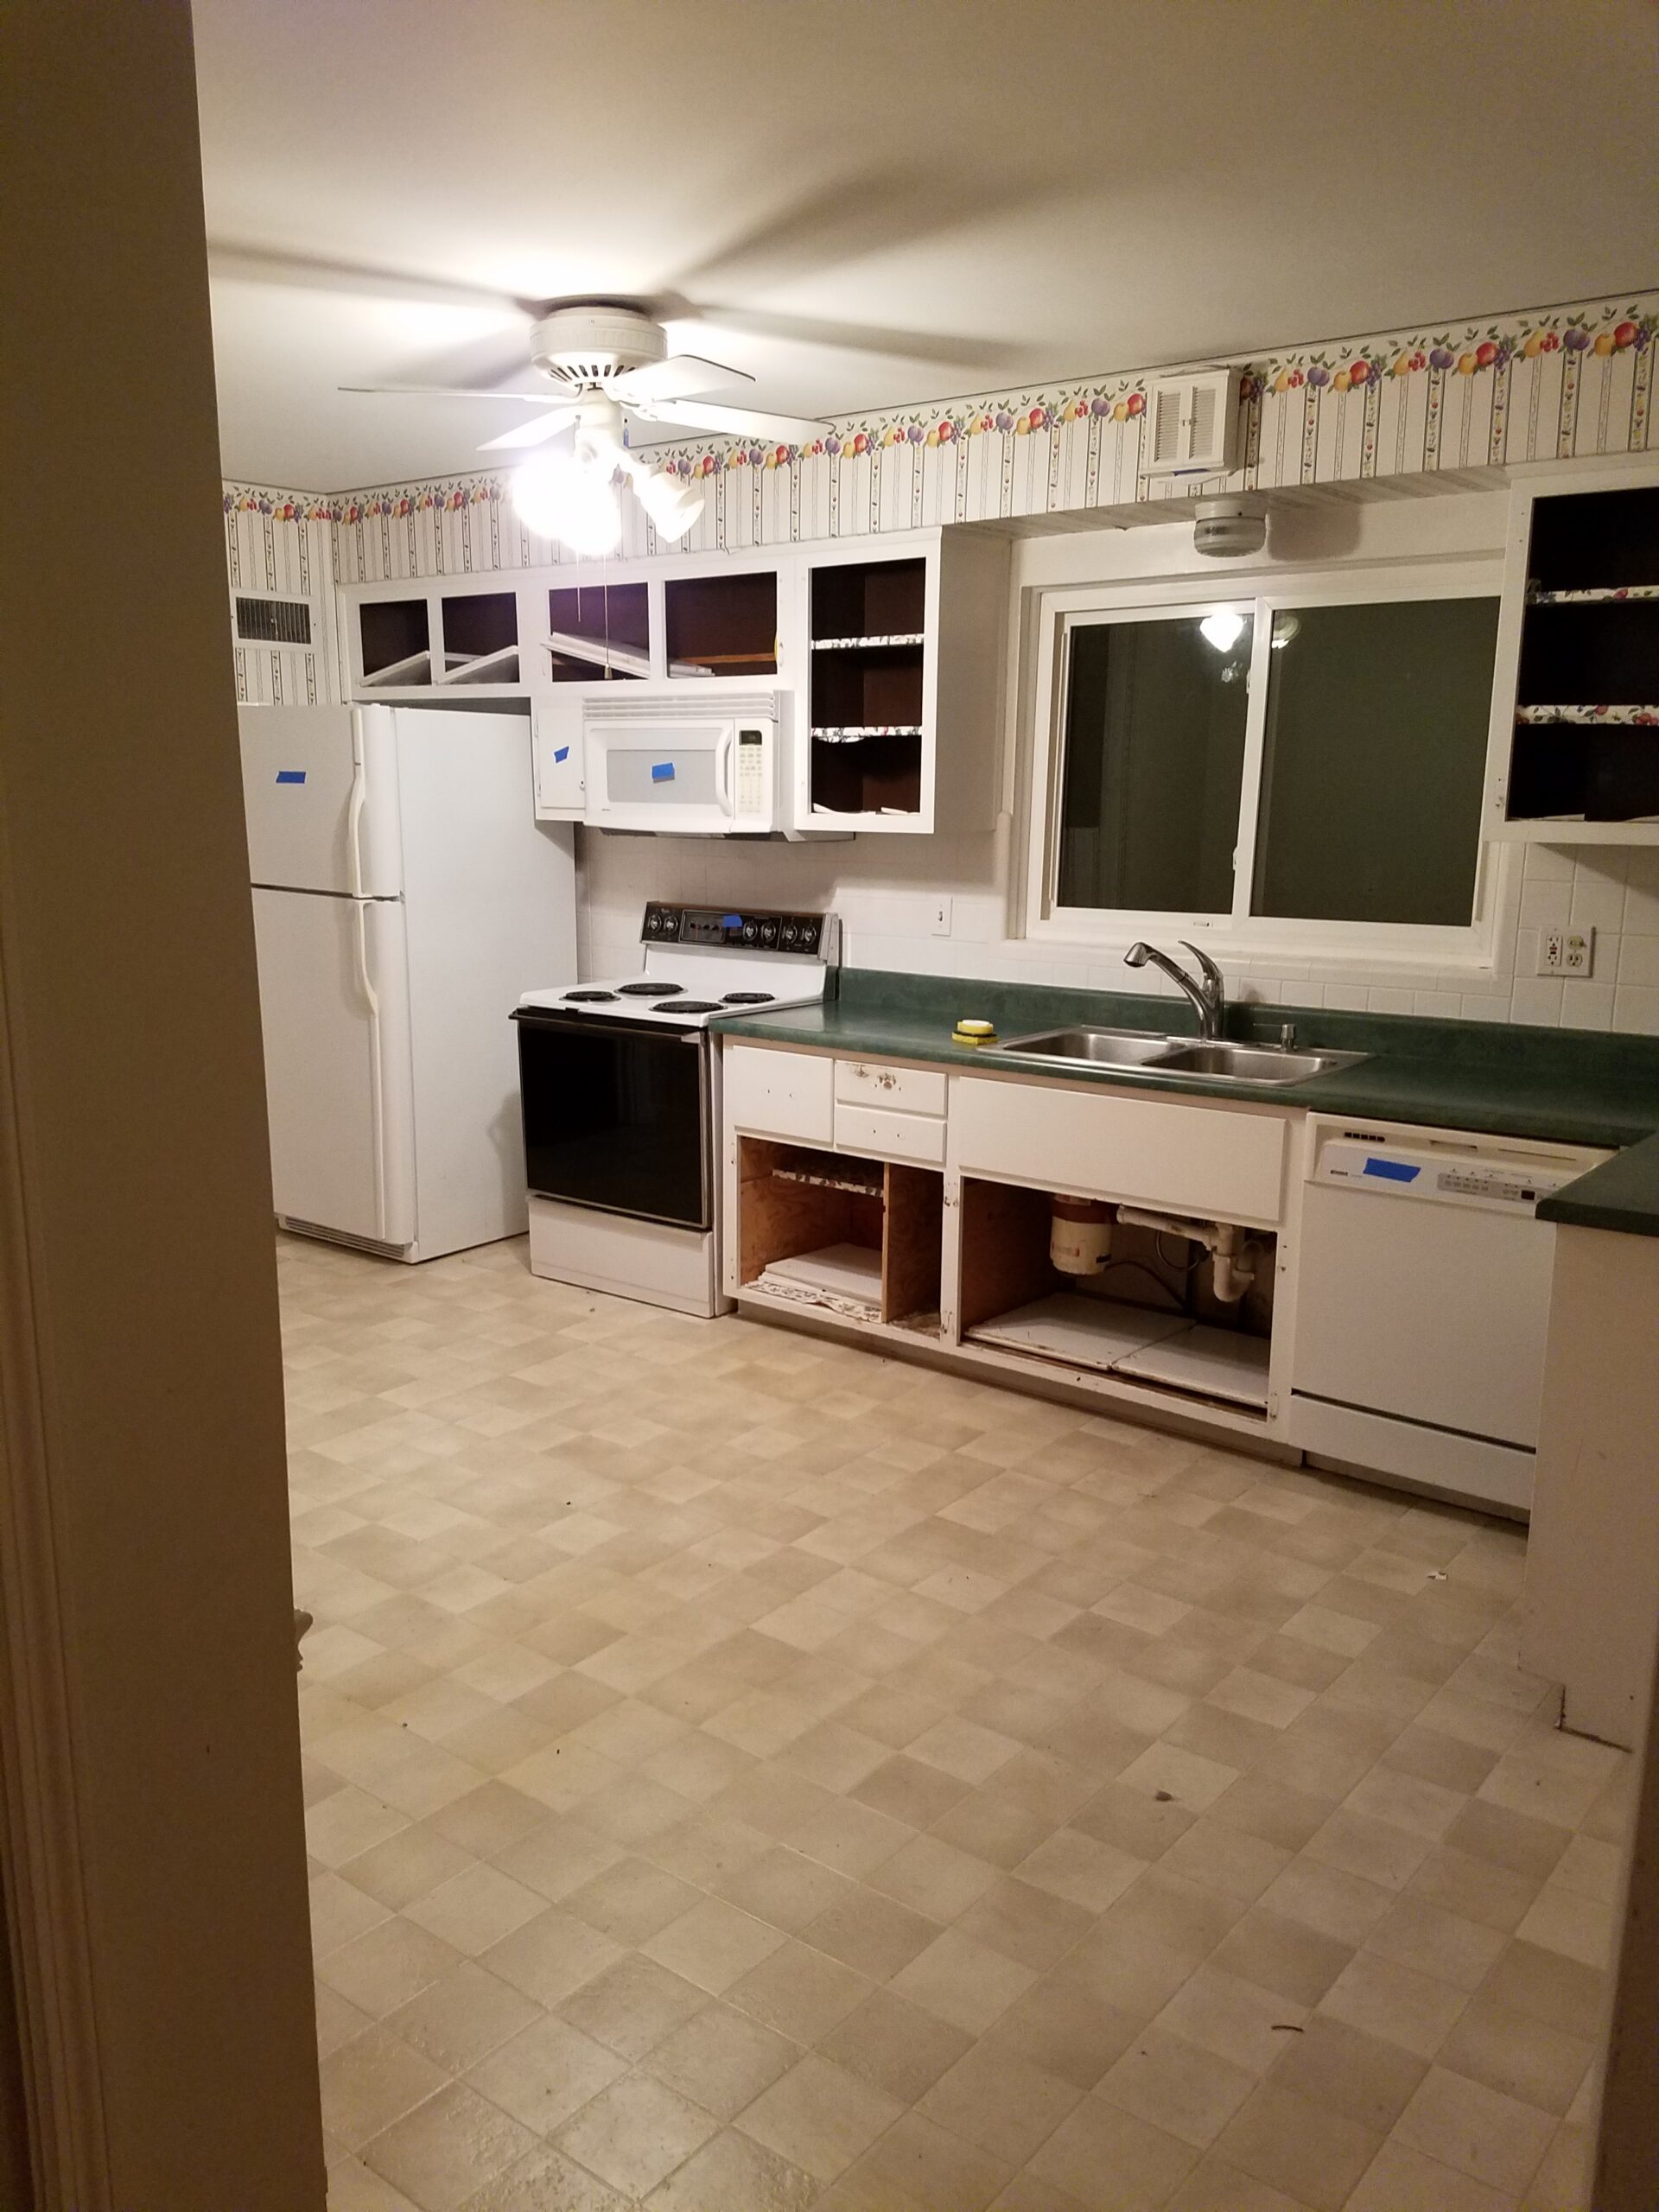
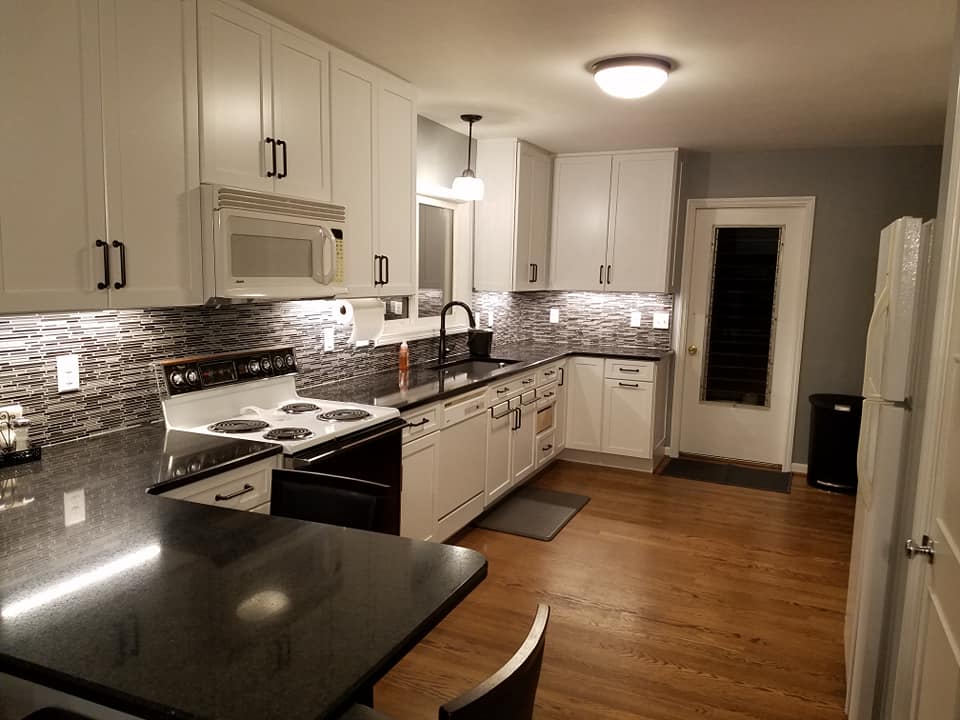
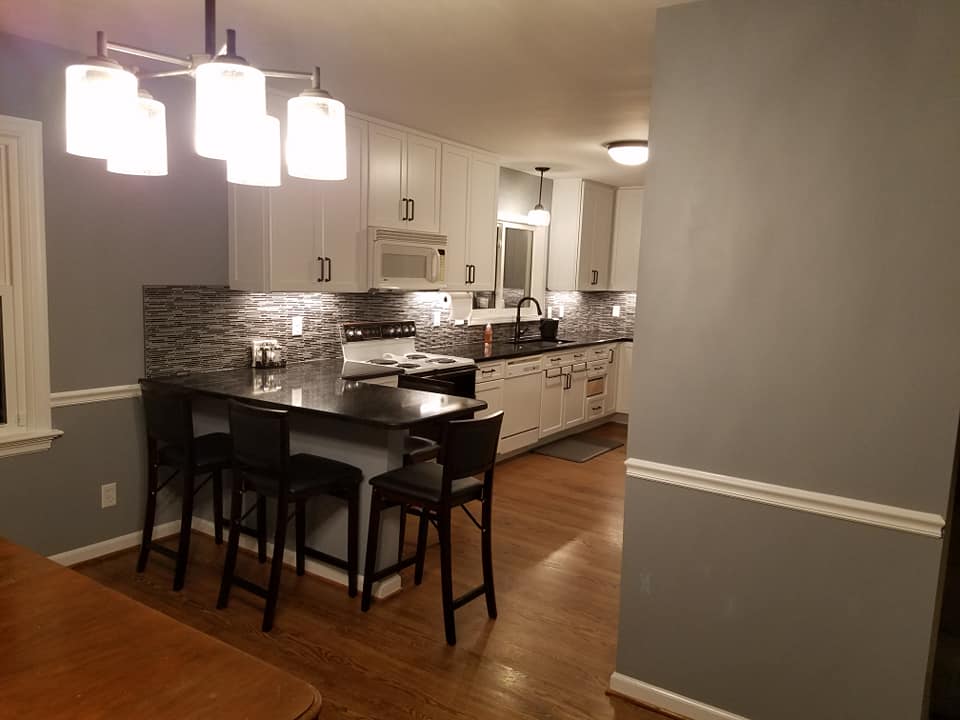
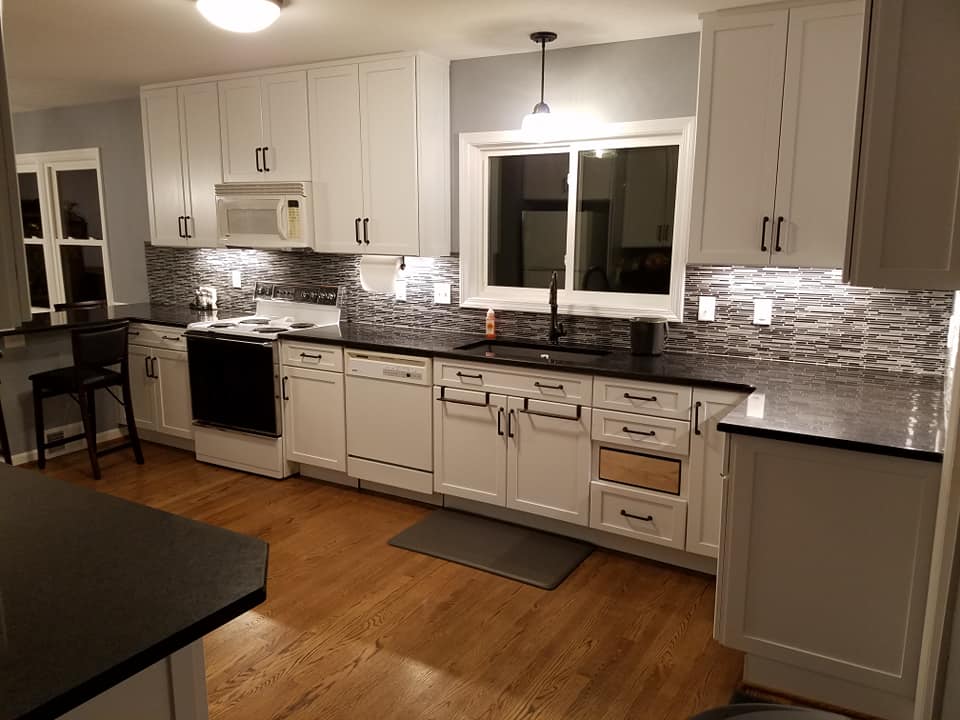
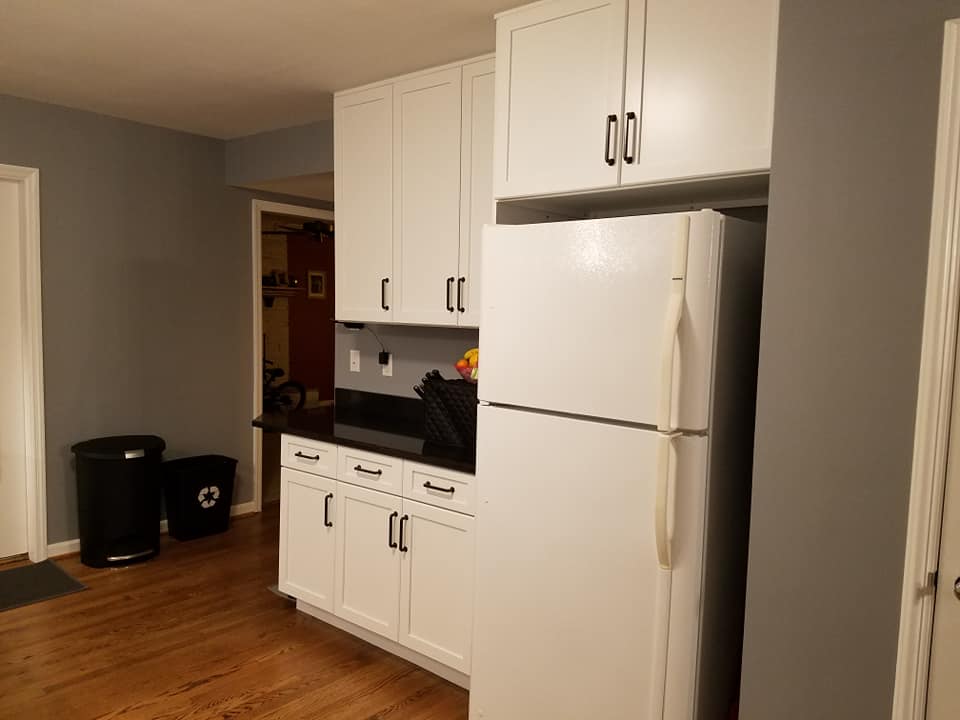
Here are some before and after photos of the kitchen. Note that I have already removed the doors on the old cabinets to keep the hardware and there is 1 missing drawer front as I measured wrong and had to resize it.
Follow this entire series to see how I pulled this massive job off in my small basement shop.
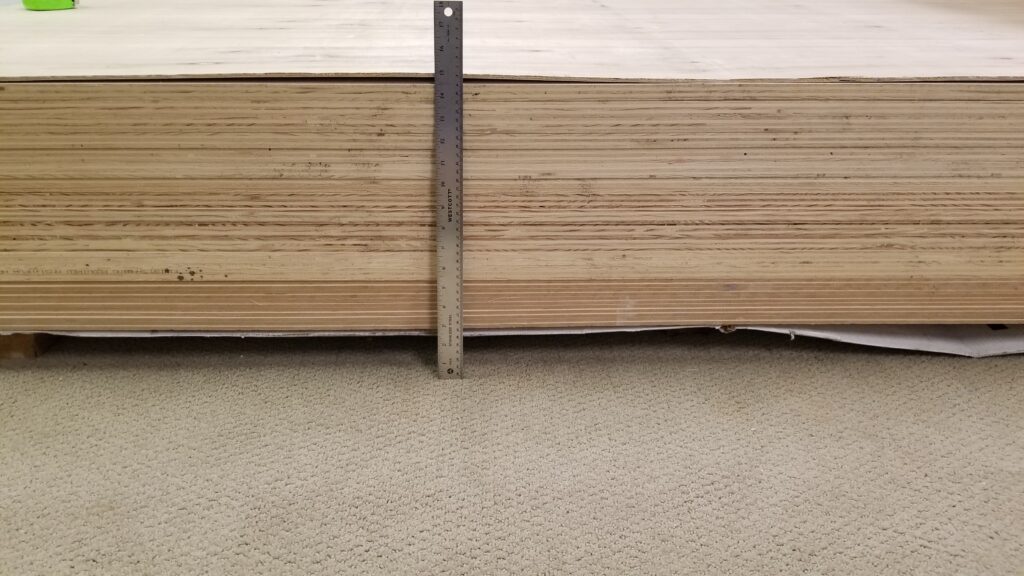
I cannot give you the exact amount of board feet in Maple I used but I can show you how much Maple plywood went into building them. This plywood was used for the cabinet boxes and shelves. In the end I had 2 sheets of 1/4″ and 1 sheet of 3/4″ plywood leftover. Part of this would be to build a bookcase for my son’s room. This can be seen in a different article / video.
The first part of this series involves me primarily explaining what I’m doing as I start the upper cabinet face frame build. I skip ahead in and already have some of my S3S milled down to the proper thickness and ripped to the proper lengths so we can jump right into building the face face frames.
For the face frame joinery I use Kreg Pocket screws along with wood glue. In the past I used to use dowels and glue but this method is much faster as there is half the amount of holes to drill. I have also found that most modern cabinets are made this same way so why not take advantage of current methods. I’ve also experimented with biscuits and glue but found that this method created open slots on smaller dimension lumber.
I’ve included a few Amazon Links below for the equipment and materials I used.
Equipment and Materials Used
- Kreg Pocket Hole Jig K4 Master System
- Kreg KHC-Premium Face Clamp
- DeWalt DC825 Impact Driver
- 12″ DeWalt DWS779 Double Bevel Compound Miter Saw
- 10″ Craftsman Contractor Table Saw
- 12 1/2″ Craftsman Surface Planer (new model than mine)
- Titebond II Glue
- Maple (from a hardwood supplier)
- 1 1/4″ fine thread pocket screws
Some of the links in my video description and article above are Amazon Affiliate links. As an Amazon Associate I earn from qualifying purchases. If you would like to make different purchase from Amazon, you can also use the storewide link.