Build the face frames first and you are going to have to figure out the cabinet carcass widths. The sides are easy right? They are just the height of the face frames but how do you get the top and bottom panel dimensions.
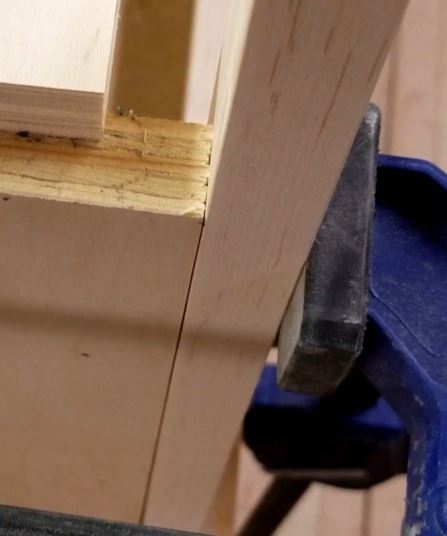
Let us explore that. The method I used was simply to have two pieces of scrap side material clamped to the exact position I wanted using some Irwin Quick Clamps. I drew a line on each one representing how deep the dado would be cut. Once this was done it was as simple as measuring between the two lines.
I completed this methodology on 3 cabinet types – a cabinet with non-exposed sides, a cabinet with 1 exposed side, and 1 non-exposed side, and a blind corner cabinet (which for me was 1 exposed and 1 non-exposed side.
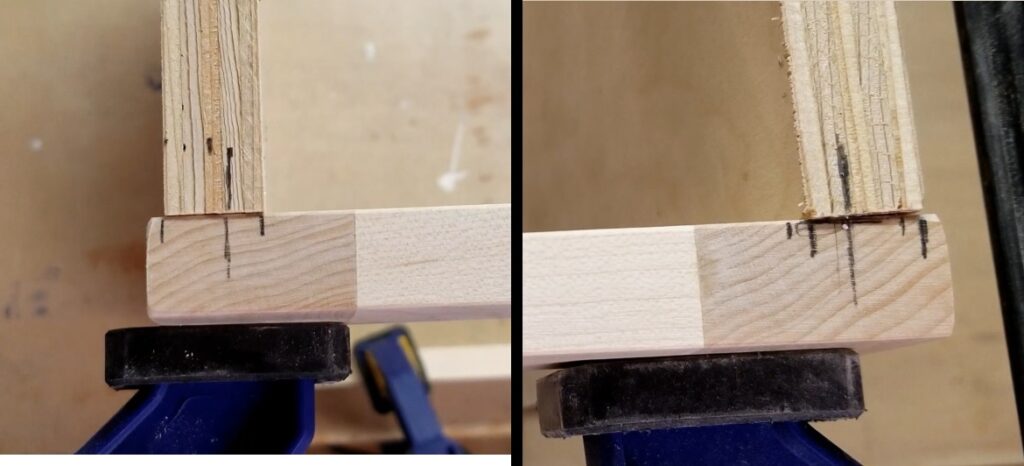
Using a scrap piece of wood I drew a line representing the length of the top and bottom and was able to quickly measure it out with a tape measure.
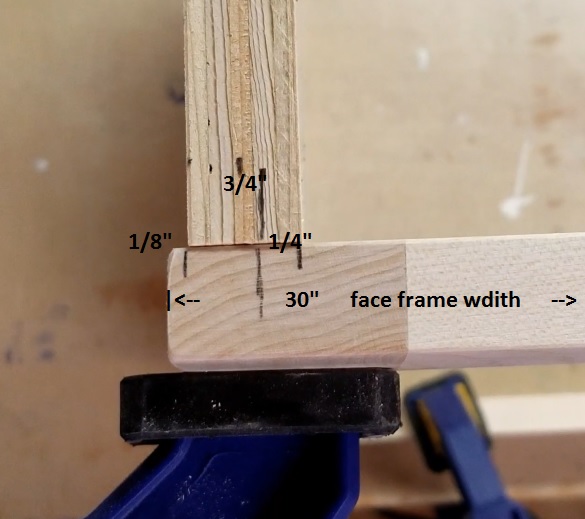
Now, this is kind of cumbersome at first but once you get the idea of what you’re doing you can easily take the width of the face frame (F) and just subtract the reveal amount (R), subtract the side material thickness (M) and add the dado depth (D) to come out with a formula like L = F – R – 2M + 2D. The only variables that change for me are the face frame length and the reveal amount because in some cases I had 1 reveal or 1/8 inch. In other cases, I had 2 reveals or 1/4 inch and in others, I had no reveal or 0 inches for my R value. My material thickness for the sides remains constant at 3/4 inch and my dado cuts at 1/4 inch.
In the video the first example I show is a cabinet with 2 non-exposed sides. For this my formula equates to L = F – 2R – 2M + 2D or L = 30″ – 2(1/8)” – 2(3/4)” + 2(1/4)” or 28 3/4″
I’ve included a few Amazon Links below for the equipment and materials I used. Some of the tools I’ve used are older models and I’ve linked newer or different brand’s equivalent.
Equipment and Materials
- IRWIN QUICK-GRIP Bar Clamp, One-Handed, Medium-Duty, 12-Inch
- Kobalt 25-ft Tape Measure
- Bessey Spring Clamp Set
I hope you find this video useful and can use some of the tips presented.
Some of the links in my video description and article above are Amazon Affiliate links. As an Amazon Associate, I earn from qualifying purchases. If you would like to make a different purchase from Amazon, you can also use the storewide link.