Dado cuts for cabinet carcasses are just as important as the other dimensions for the cabinet. After all, a loose dado cut creates sloppy joinery and is not very strong. So how do you go about making sure your dado cuts are perfect?
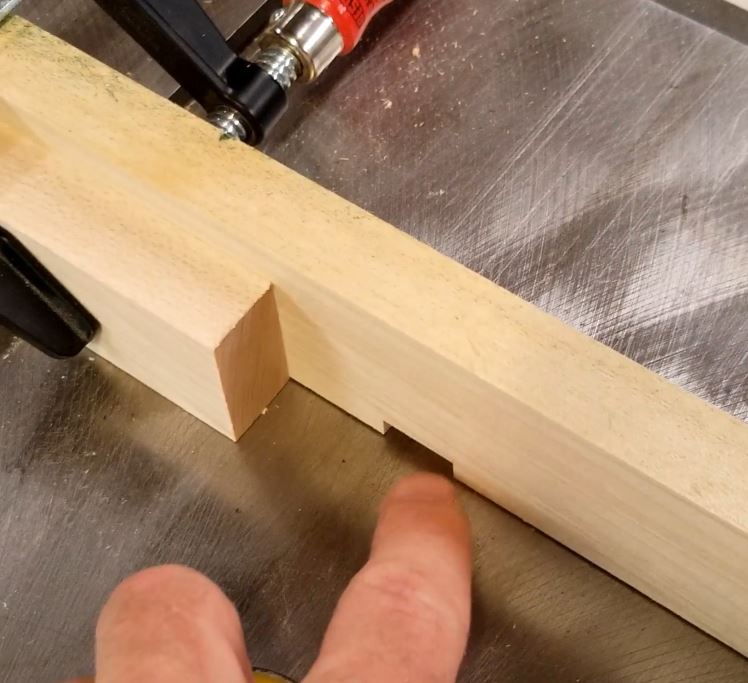
Well, that task is actually easier than one might think however it may require adjustments followed by test cuts. The first thing you need to do is figure how a close estimate of your dado cut by measuring the wood that will go into the cut. For me it is almost 3/4″ thick but not quite. It’s not quite 11/16″ either but in between those. So, I set my adjustable dado blade to close to 3/4″ width and we’ll take a test cut and see if the insertion material fits loose, perfect, or too tight.
I continue to repeat this process until the material that is being inserted can pick up the board with the test cuts in it. You want t snug fit, generally, so you can lift the work without it falling out. This will allow a snug fit with glue bonding the two together. If the cut is too wide and loose the glue will not be able to get a good bond and the joint will be weak.
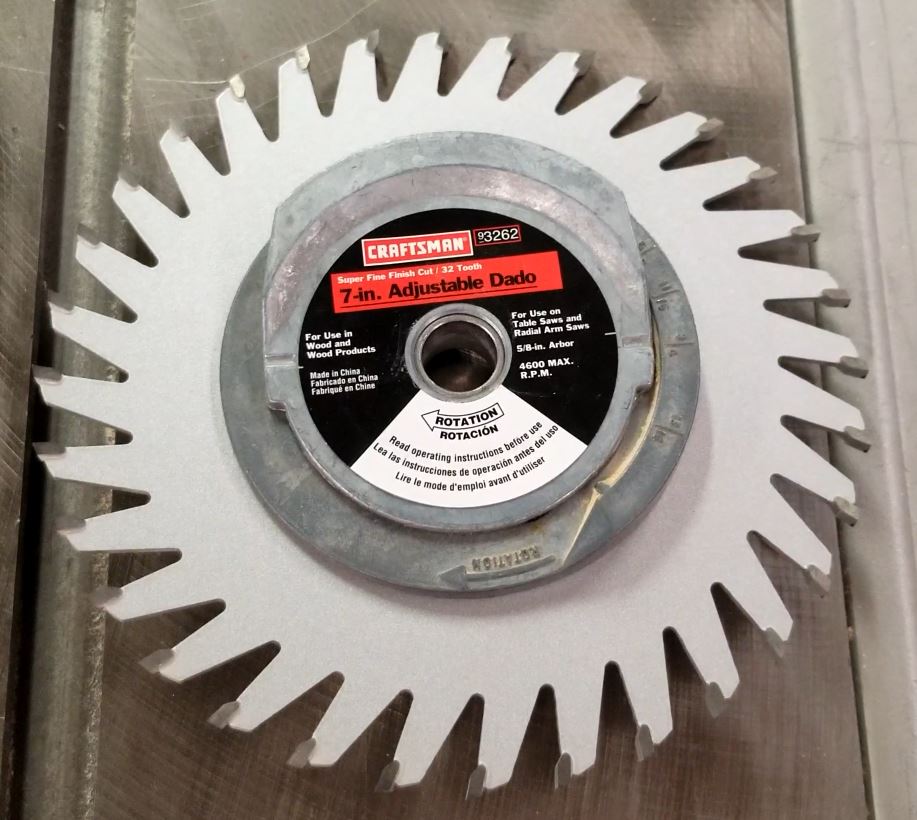
Unfortunately, I do not have a stackable dado blade in which you would just add or remove some shims. If your cut is loose, just slide the shims in the cut until it’s snug. That’s how many shims you need to add to your stack between the two outer blades. Add them according to the manufactures recommendation.
Since mine is adjustable I just have to keep turning the adjustment until the fit is perfect. Repeat this process until you get that nice snug fit.
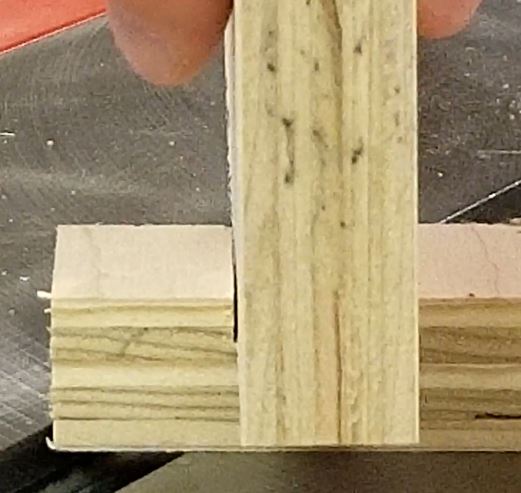
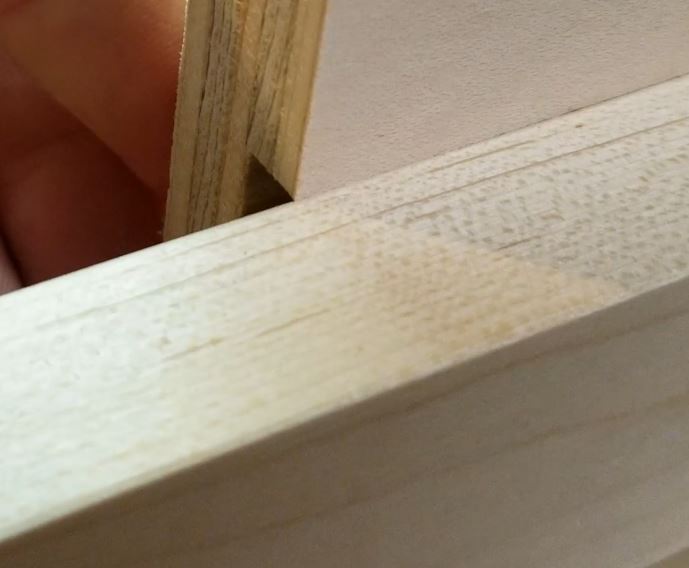
Test Cut 1 – Too Loose 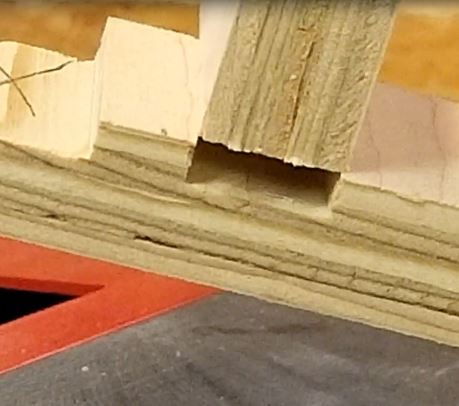
Test Cut 2 – Too Tight 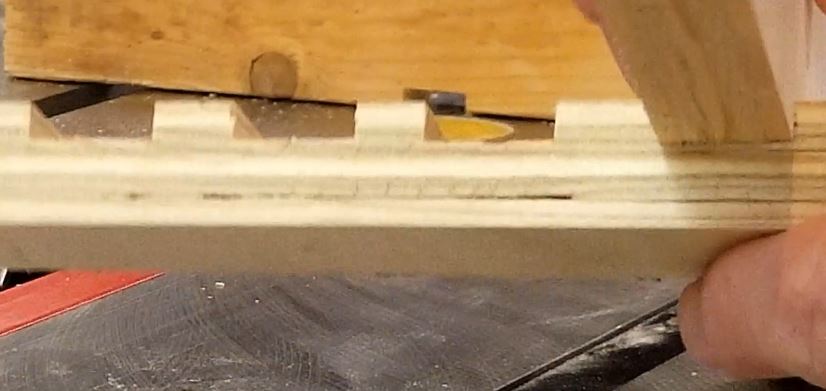
Test Cut 4 and Final Cut – Snug Fit
Once you get your dado zeroed in where you need it cut all your dado cuts at once. This will save time getting it to adjust again. So, you should be sure to have all your material you’re going to dado ready and the side marked you want to dado on.
To get the distance I wanted on the bottom cut I used a piece of scrap material again (notice I’m always using scrap first). This allowed me to get a close distance using a stop block. After running the blade through my sacrificial miter fence I was able to determine the exact distance I need to set up my rip fence to get a perfect cut.
I also experienced chip out on the material because of the way my dado cuts. If your dado does the same thing you can try some methods such as putting painters tape down to stabilize it, pushing your work much slower through the saw, a zero clearance insert for your dado, or even a combination of the two. For me, it was just slowing down my cut speed.
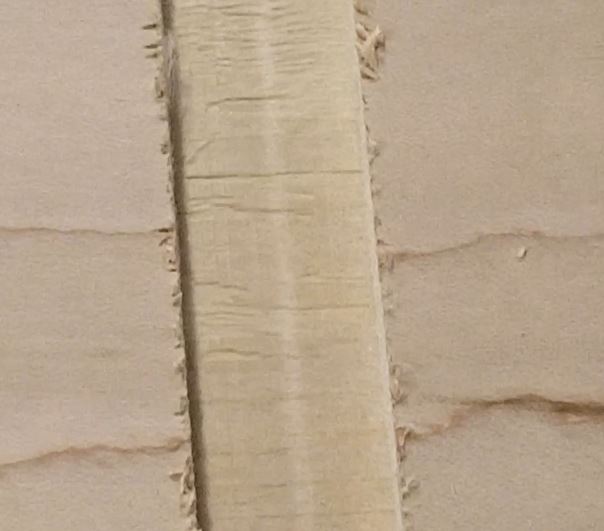
Dado Chip Out 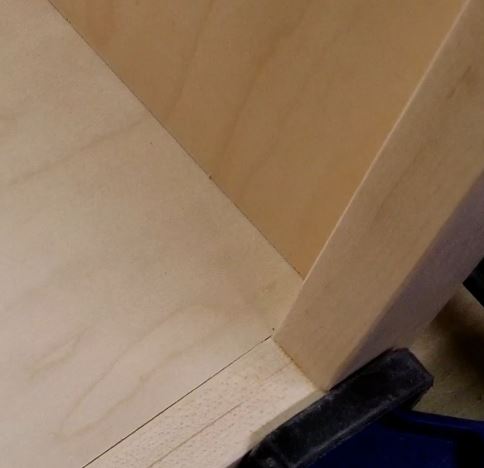
No Chip Out
The main important thing to take away is always to start with a scrap piece of wood before moving onto your actual workpiece. This can not only save your workpiece from being ruined but the additional time it takes to make repairs or dealing with a cut that is too tight or too loose.
I’ve included a few Amazon Links below for the equipment and materials I used. Although Craftsman does not make an adjustable dado blade anymore I’ve included on to a Porter-Cable Oldham Blade as well as two other stack dado sets if you want to check it out. Some of the tools I’ve used are older models and I’ve linked newer or different brand’s equivalent.
Equipment and Materials
- IRWIN QUICK-GRIP Bar Clamp, One-Handed, Medium-Duty, 12-Inch
- Porter-Cable Oldham Blade
- The Mibro Group 416381 8″ Carbide Stacking Dado Blade Set
- Freud 6″ x 10T Pro Dado Set
- Freud 10″ x 32T Super Dado Sets (SD510)
I hope you find this video useful and can use some of the tips presented.
Some of the links in my video description and article above are Amazon Affiliate links. As an Amazon Associate, I earn from qualifying purchases. If you would like to make a different purchase from Amazon, you can also use the storewide link.